{autotoc enabled=yes}
If you do own a FRITZ!Box, it is fairly simple to setup a Site-to-Site VPN connection to your Azure virtual network.
This article will walk you through all steps using the GUI (2018.05.23)
By the way, you might want to change the default FRITZ!Box subnet (192.168.178.0/24) to something else e.g. (192.168.111.0/24), otherwise this tutorial might not work as your FRITZ!Box will prevent some required changes.
First Step: Create a "Virtual Network"
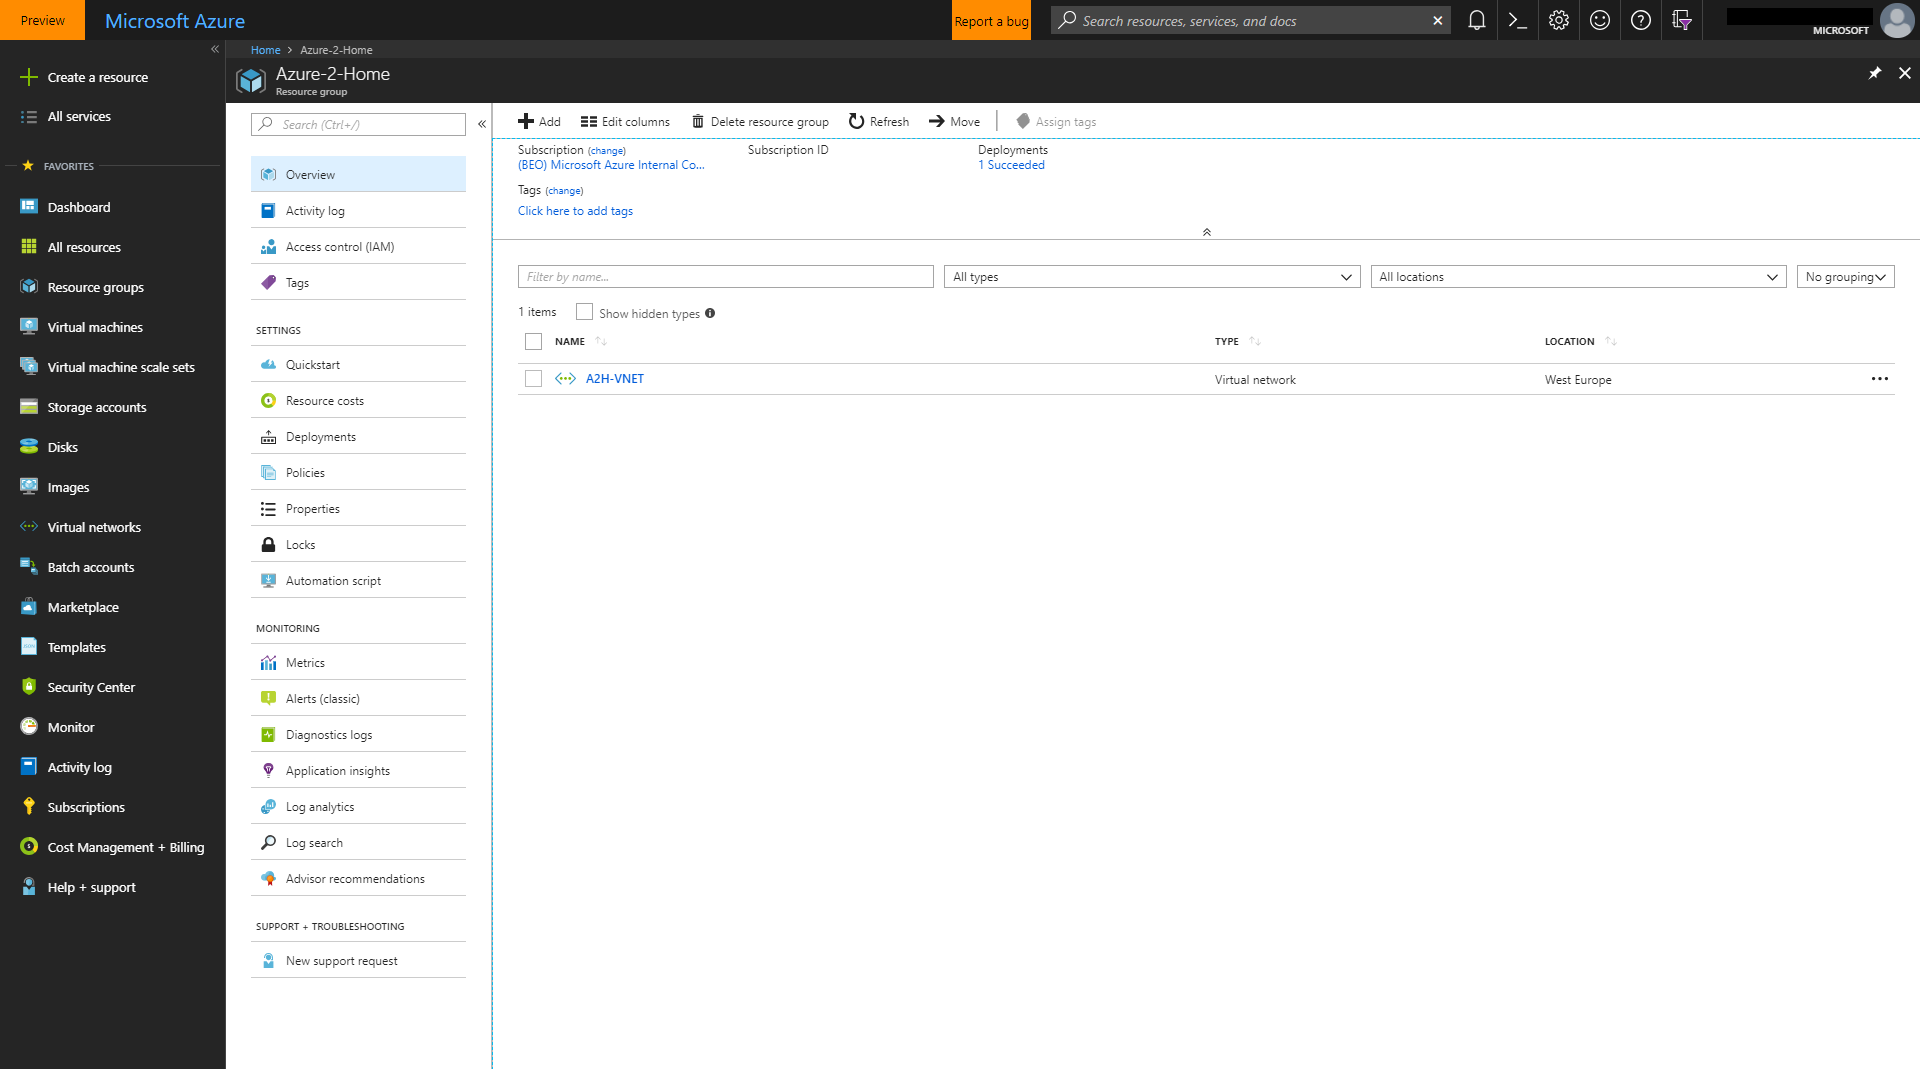
Create a "Virtual Network" in Azure with an address space of e.g. 10.3.0.0/16 and a default subnet of e.g. 10.3.0.0/24 which must not overlap with your network at home (e.g. 10.0.0.0/24).
Lets name the VNET "A2H-VNET" and the default Subnet "A2H-Default-Subnet"
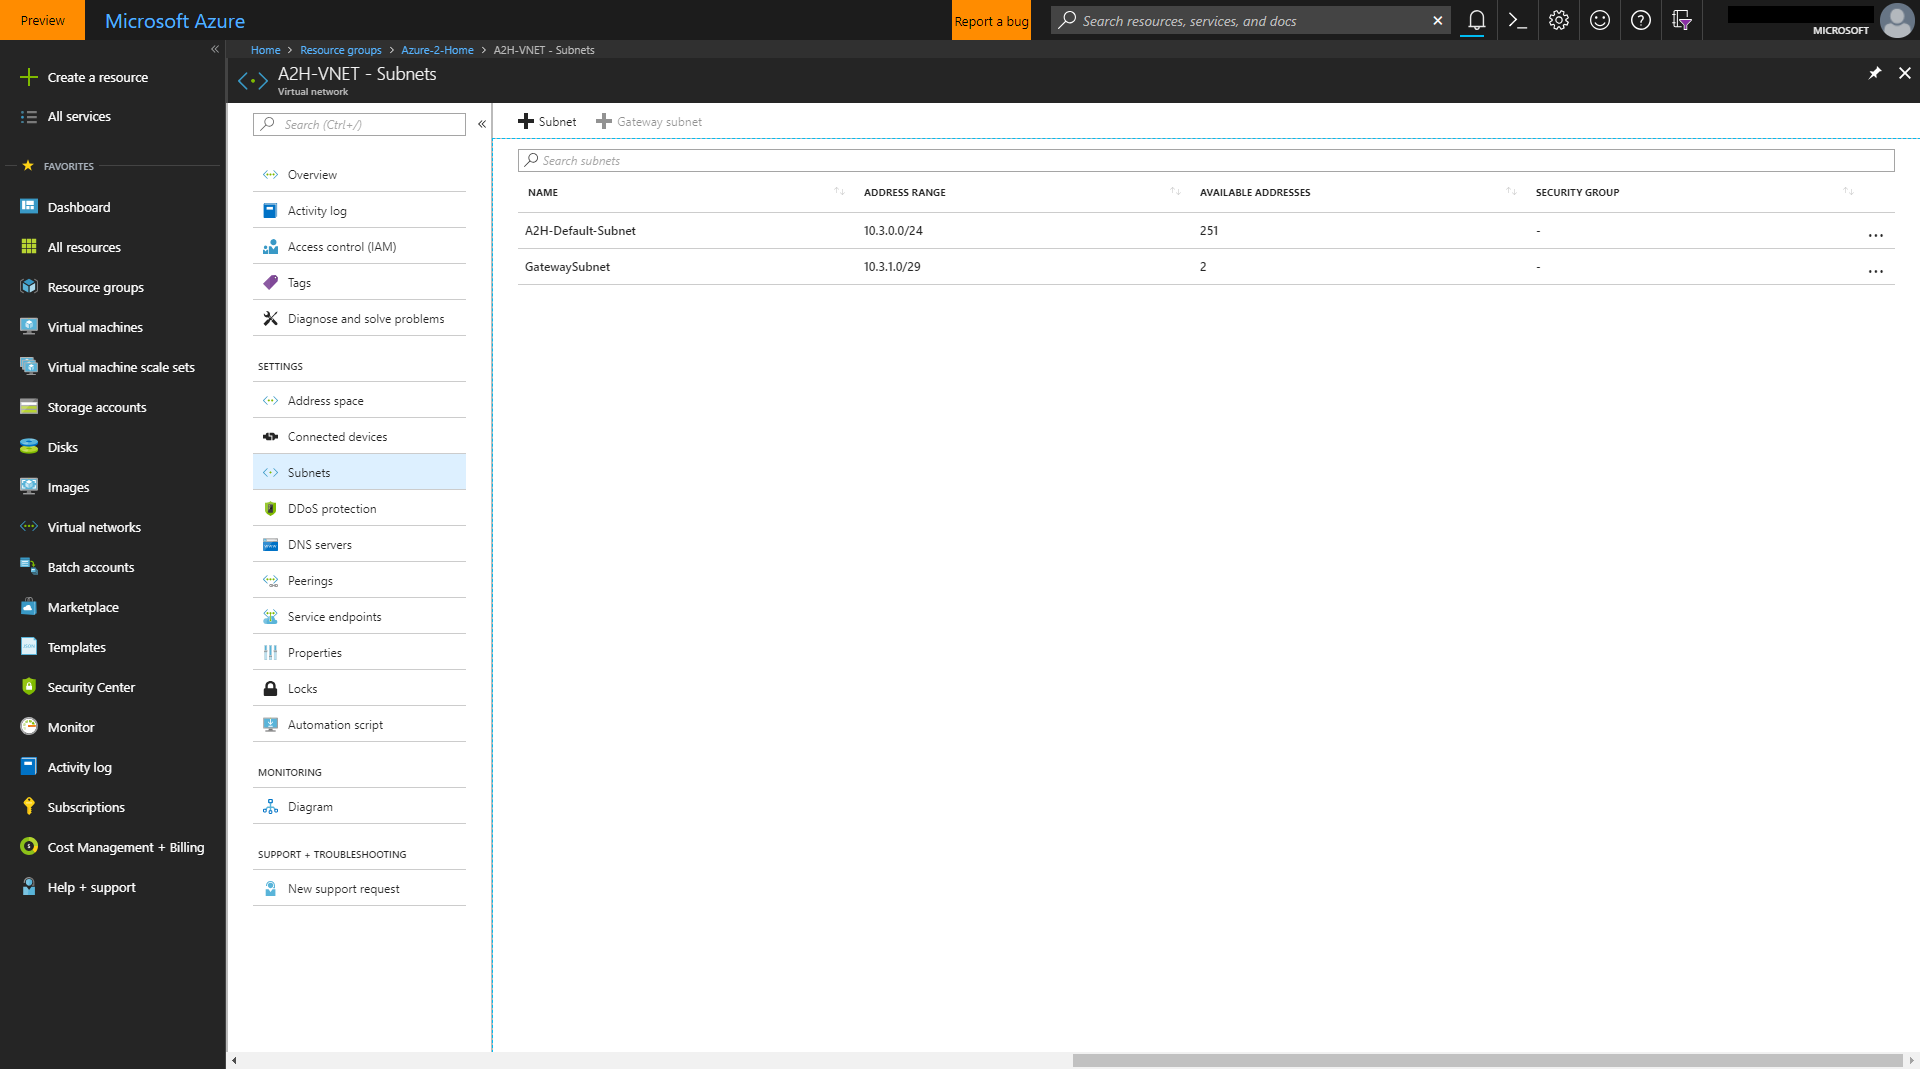
Within this VNET, create another subnet, a "Gateway subnet". Again, this must not overlap with your home network or the default subnet "A2H-Default-Subnet". Since we only need this subnet to hold "Virtual Network Gateway" IP, we can use a e.g. 29 subnet. Something like this: 10.3.1.0/29
Once this has been created, the VNET "A2H-VNET" should look similar to this:
Second step: Add a "Local Network Gateway"
To successfully complete this step, we need to know our public accessible IP which has been assigned to your FRITZ!Box by your ISP.
You can either go to https://www.whatismyip.com/ or retrieve the IP from your FRITZ!Box UI:

The important thing here is, that it must be a real, routable IP. If your ISP is using NAT to connect you to the Internet, it most likely will not work.
Now add a "Local Network Gateway" to your resource group. Lets call it "A2H-LNG". Insert the public IP address of your FRITZ!Box into the field "IP address".
In the filed "Address space", you add the IP address range of you local network e.g. 10.0.0.0/24.
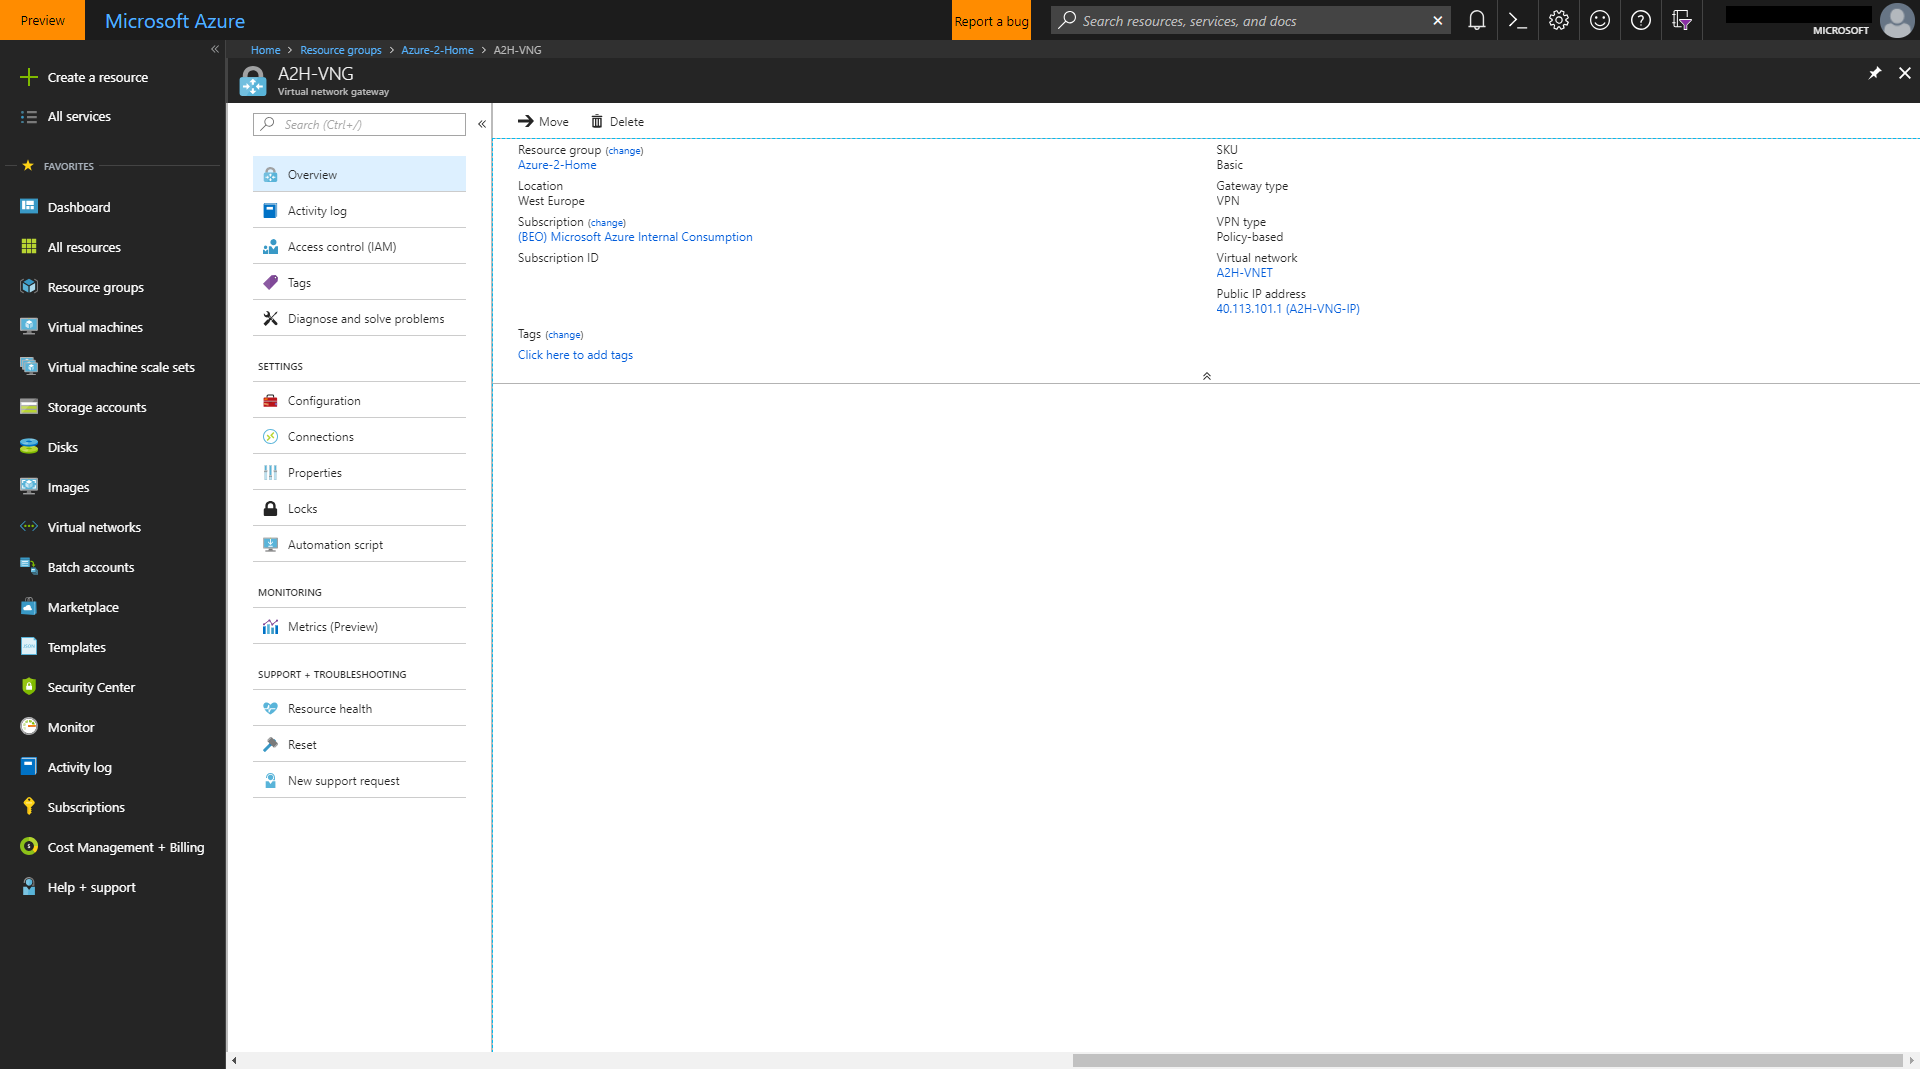
Third step: Add a "Virtual Network Gateway"
The "Virtual Network Gateway" will route between your local private LAN and the VNET in Azure which will hold your future Azure VMs or services.
It is important to create a "Policy-based" VPN. A "Route-based" VPN did not work for me. Lets name it "A2H-VNG".
As "Virtual network", select the VNET "A2H-VNG" which we created in the first step and create a new "Public IP address" which we call "A2H-VNG-IP".
Fourth step: Create a "Connection" to your FRITZ!Box
This step will define the connection from the "Virtual Network Gateway" to your FRITZ!Box. For this to work, we need a "Pre Shared Key" (PSK) which is used to authenticate the connection between the Azure VPN service and your FRITZ!Box VPN service.
AVM provides a tool called "FRITZ!Box-Fernzugang" which we can use to create a configuration file for the FRITZ!Box.
We pretend to create a connection between two FRITZ!Box networks: "Verbindung zwischen zwei FRITZ!Box-Netwerken einrichten"
"FRITZ!Box 1" represents your local FRITZ!Box.
"FRITZ!Box 2" represents the Azure "Virtual Network Gateway"
For "FRITZ!Box 1" we specify the FQDN (most likely a Dyn-DNS address. If you don't have one, AVM provides a cryptic one to every FRITZ!Box owner via https://myfritz.net) of the FRITZ!Box.
In my case ...vc.myfritz.net. The IP-Network of my local network is 10.0.0.0/24
For "FRITZ!Box 2" we specify the IP address of the "Virtual Network Gateway". In my case this is 40.113.101.1 and the IP-Network is 10.3.0.0/16
Choose to export the configuration files: "Konfigurationsdateien exportieren". It will ask you to save two files. We are only interested in the first one which contains the FQDN of "FRITZ!Box 1" in the filename.
Open this file and change the value of "phase2ss" to:phase2ss = "esp-all-all/ah-none/comp-all/no-pfs"
You can also change the "name" value to something more descriptive like:name = "Azure-2-Home"
Save it as "FritzBox7590-Azure2Home-VPN.cfg"
vpncfg { connections { enabled = yes; conn_type = conntype_lan; name = "Azure-2-Home"; always_renew = no; reject_not_encrypted = no; dont_filter_netbios = yes; localip = 0.0.0.0; local_virtualip = 0.0.0.0; remoteip = 40.113.101.1; remote_virtualip = 0.0.0.0; localid { fqdn = "...vc.myfritz.net"; } remoteid { ipaddr = 40.113.101.1; } mode = phase1_mode_aggressive; phase1ss = "all/all/all"; keytype = connkeytype_pre_shared; key = "a2b3ac41el4d29b48cb2a7zddd4j8a1a3"; cert_do_server_auth = no; use_nat_t = yes; use_xauth = no; use_cfgmode = no; phase2localid { ipnet { ipaddr = 10.0.0.0; mask = 255.255.255.0; } } phase2remoteid { ipnet { ipaddr = 10.3.0.0; mask = 255.255.0.0; } } phase2ss = "esp-all-all/ah-none/comp-all/no-pfs"; accesslist = "permit ip any 10.3.0.0 255.255.0.0"; } ike_forward_rules = "udp 0.0.0.0:500 0.0.0.0:500", "udp 0.0.0.0:4500 0.0.0.0:4500";}
Copy the value of "key" into your clipboard. This is the PSK.
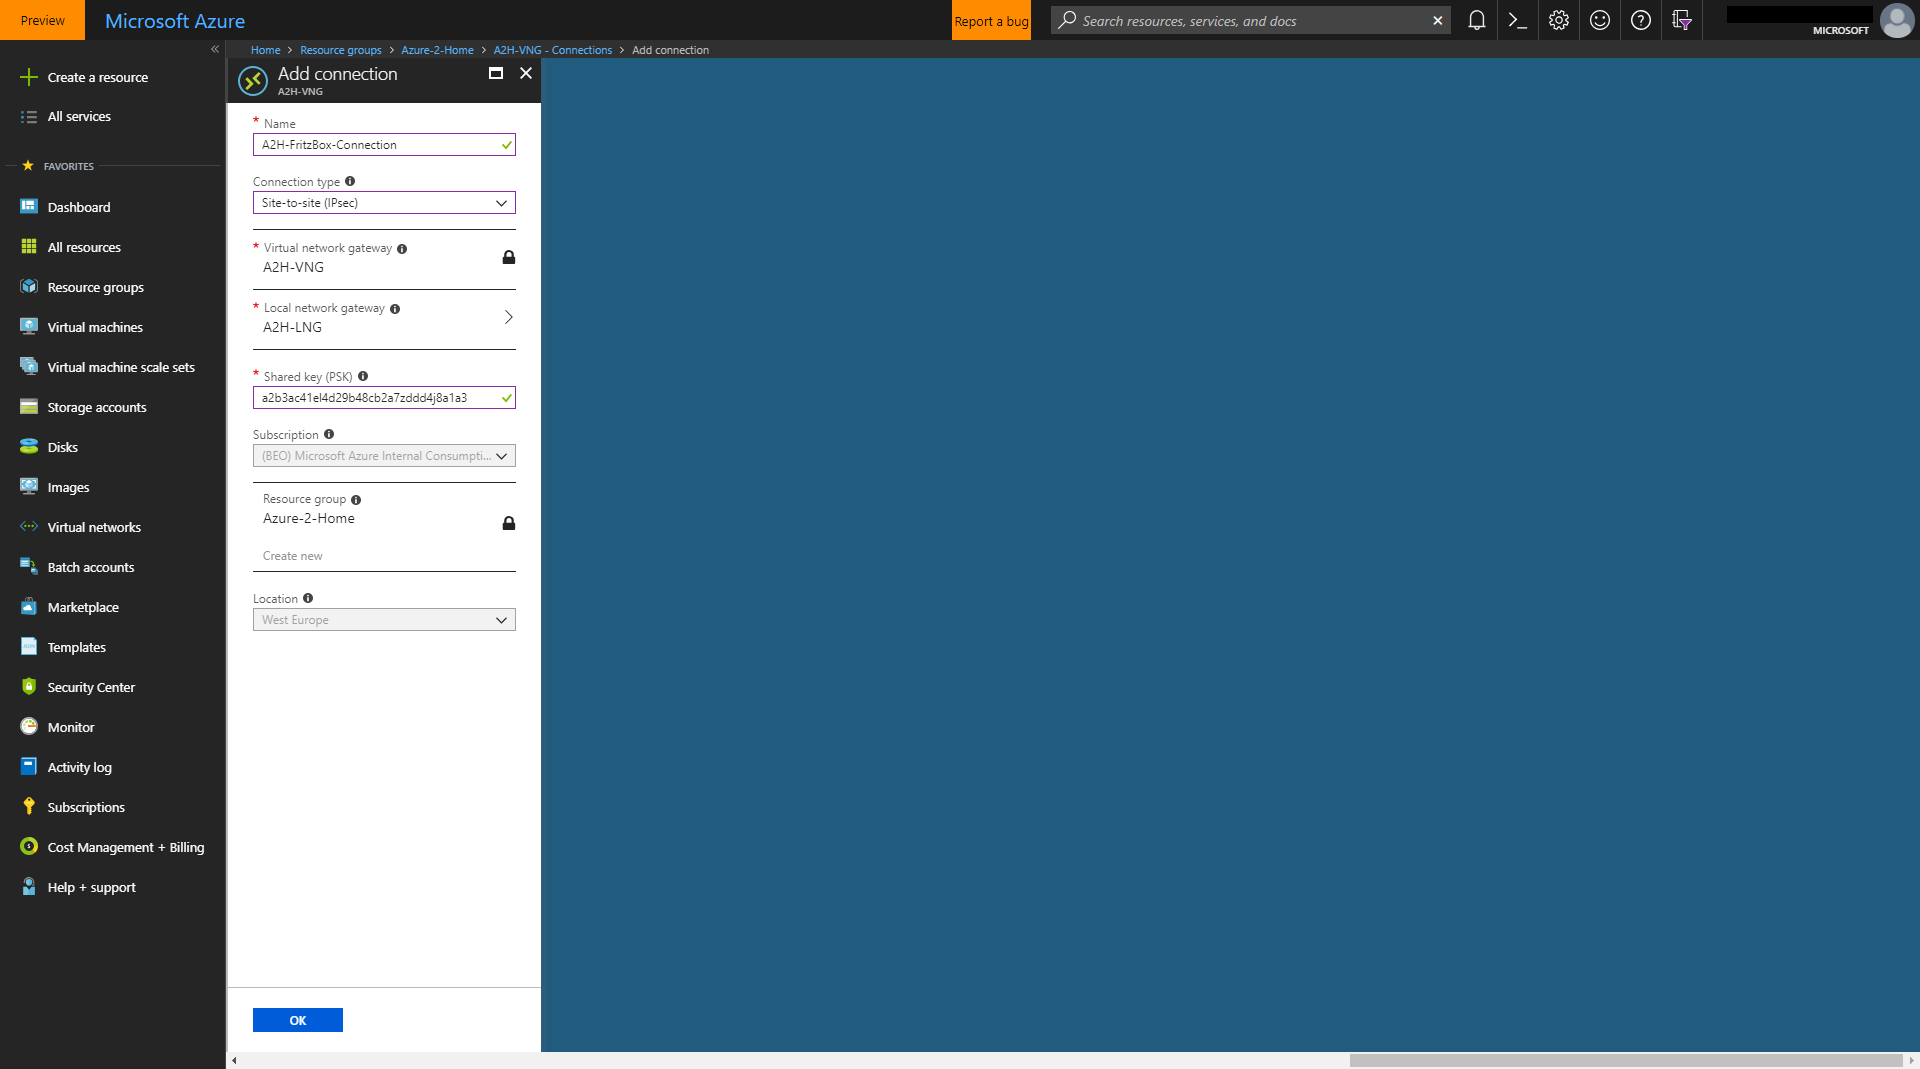
Now go to the "Virtual Network Gateway" in the Azure portal and klick on "Connections" and add a new one.
Give it a name e.g. "A2H-FritzBox-Connection". The type should be "Site-to-Site (IPsec) and the "Local network gateway" should be set to the one we created before "A2H-LNG".
Enter the PSK from the FRITZ!Box configuration file into the field "Shared key (PSK)" and you are done.
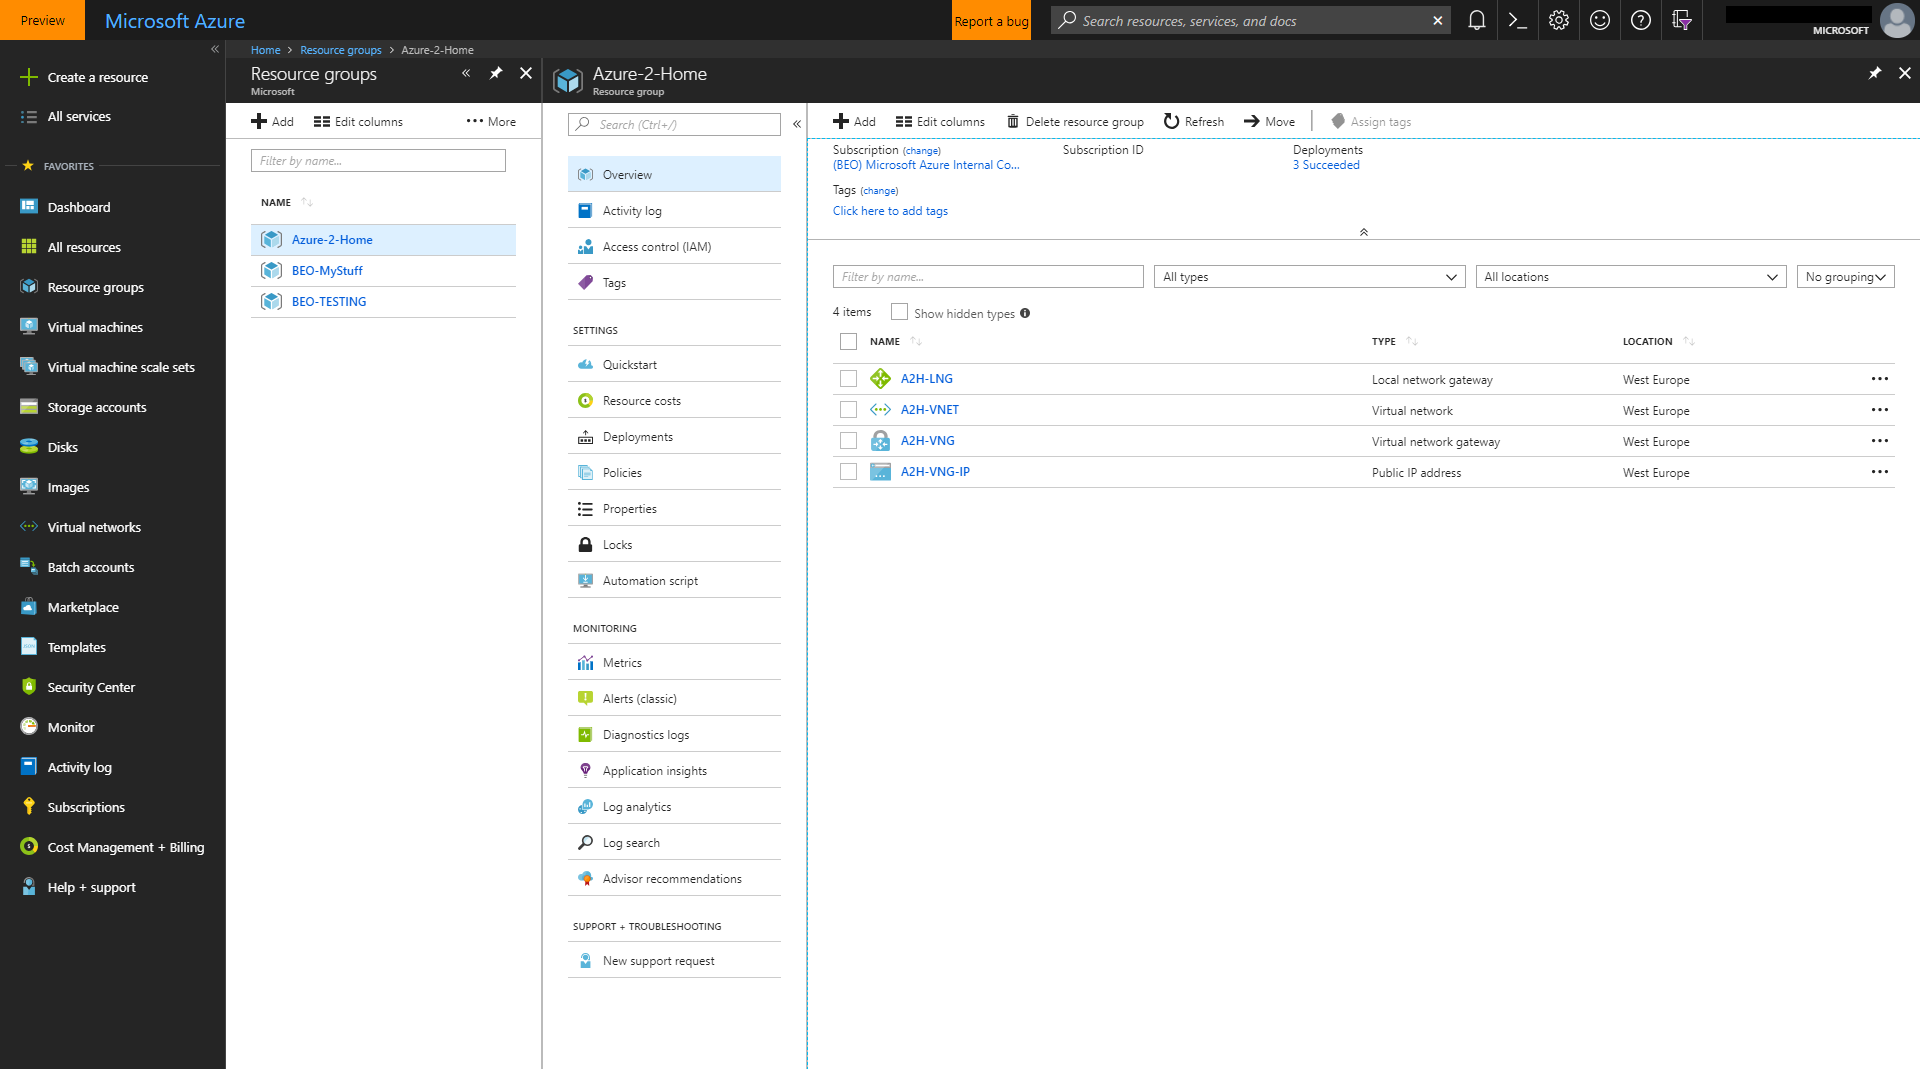
If all steps have been successful, your resource group should look similar to this:

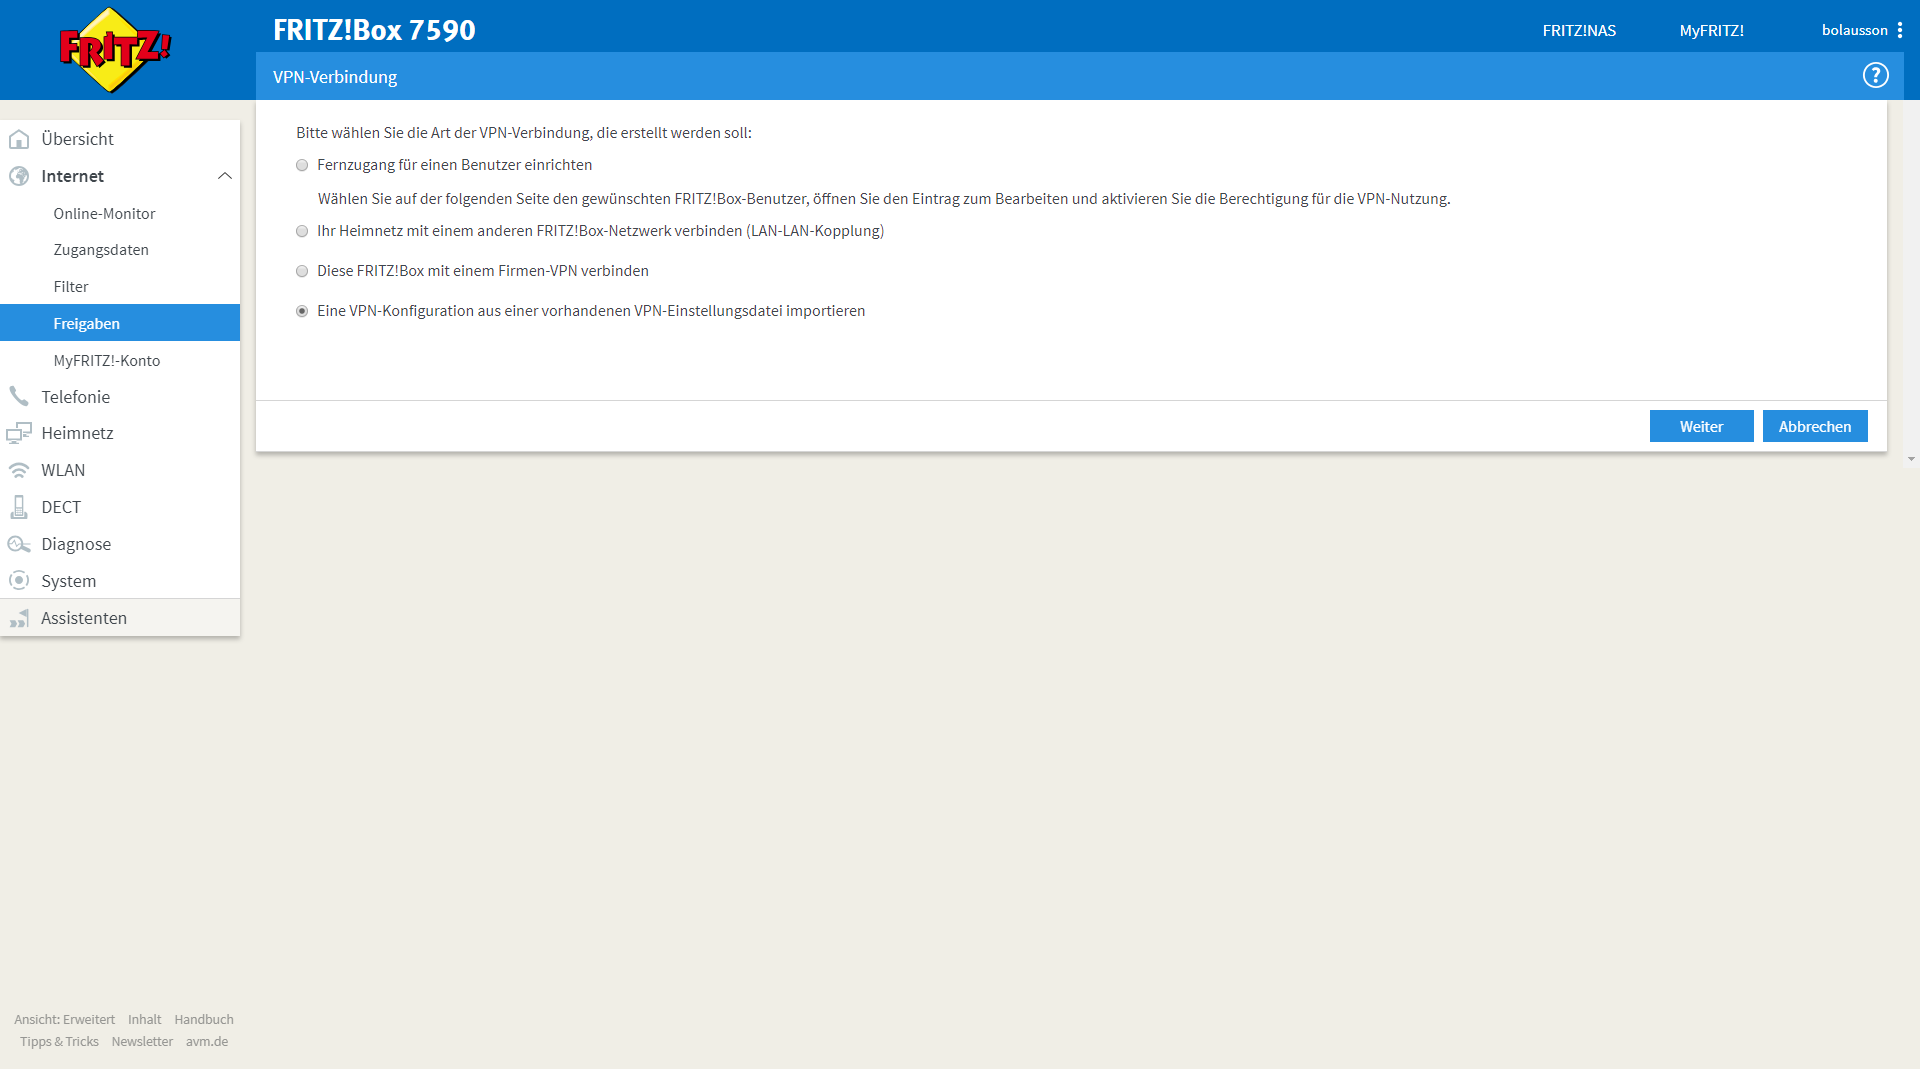
Fifth step: Setup the FRITZ!Box VPN
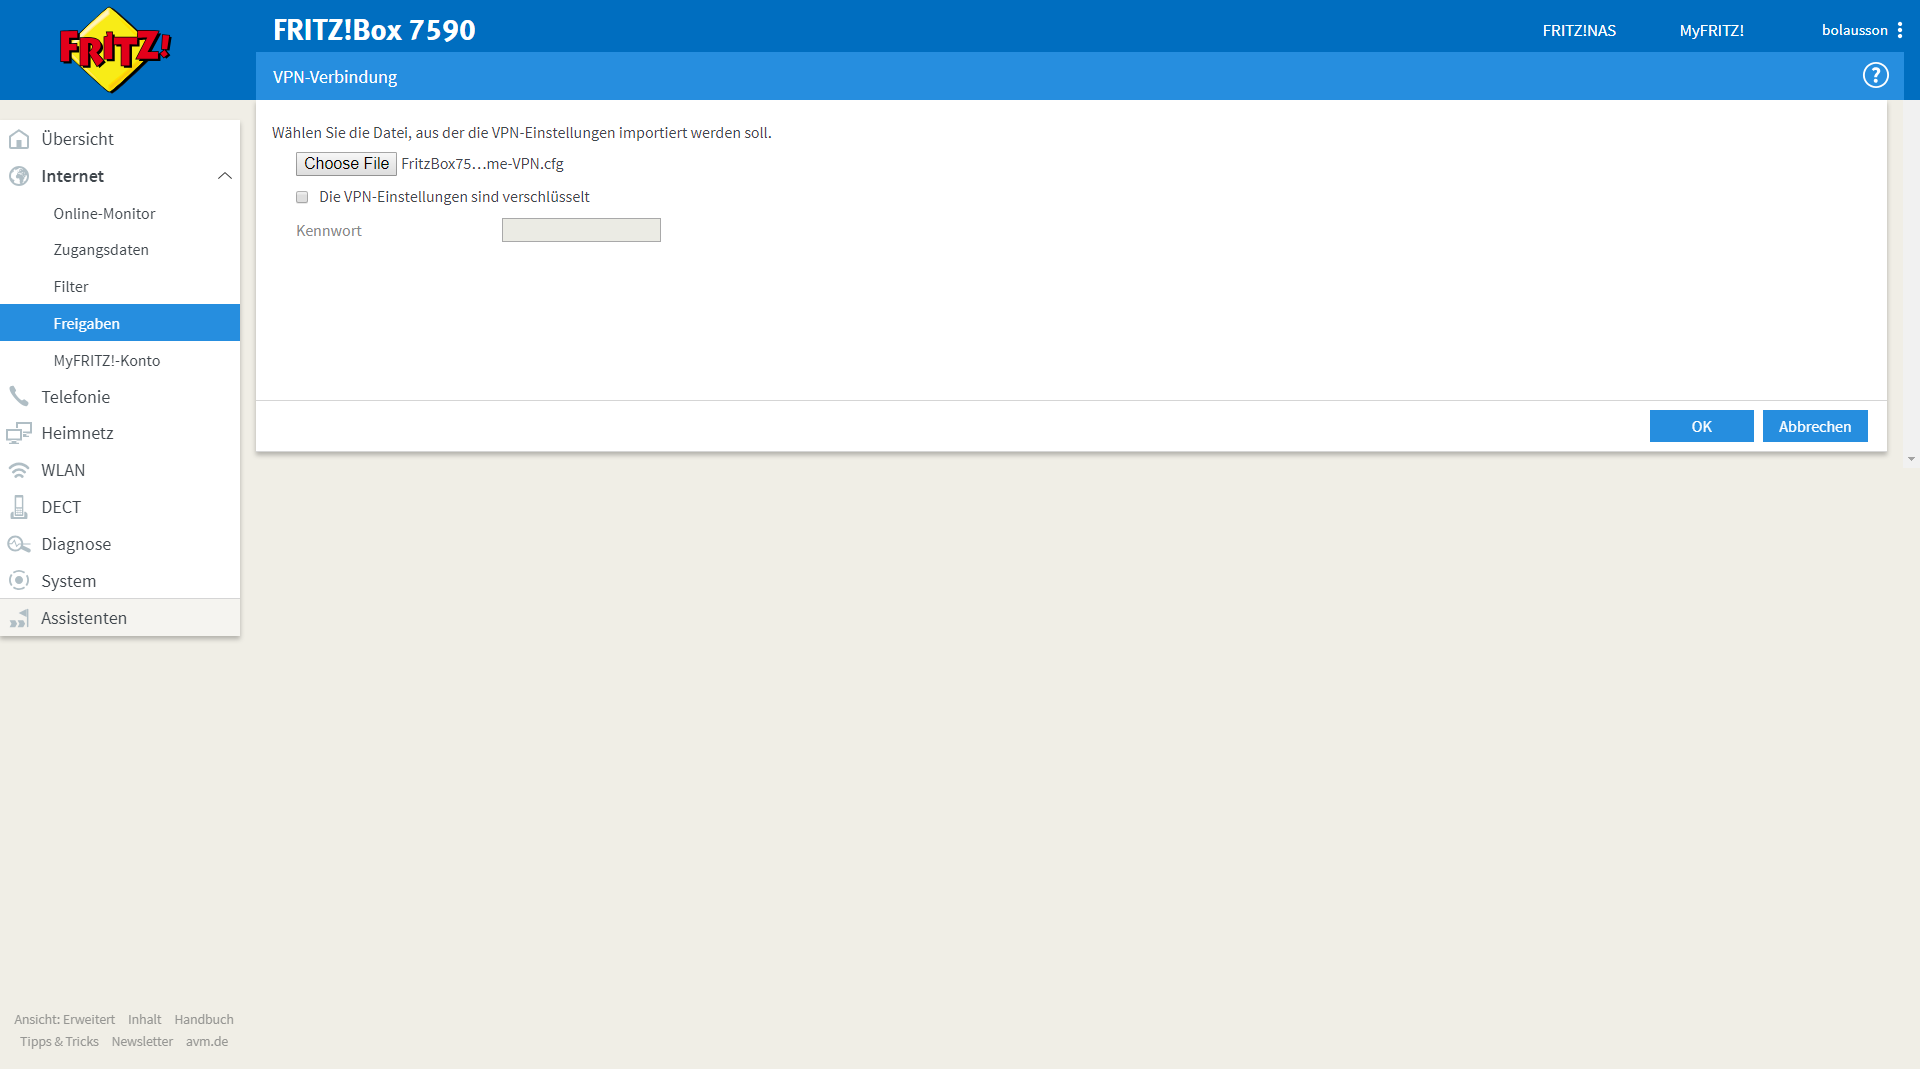
It is as simple as importing the configuration file "FritzBox7590-Azure2Home-VPN.cfg" into your FRITZ!Box which we created with "FRITZ!Box-Fernzugang" and slightly modified it.
If it was successful, the VPN page of your FRITZ!Box should look something like this:
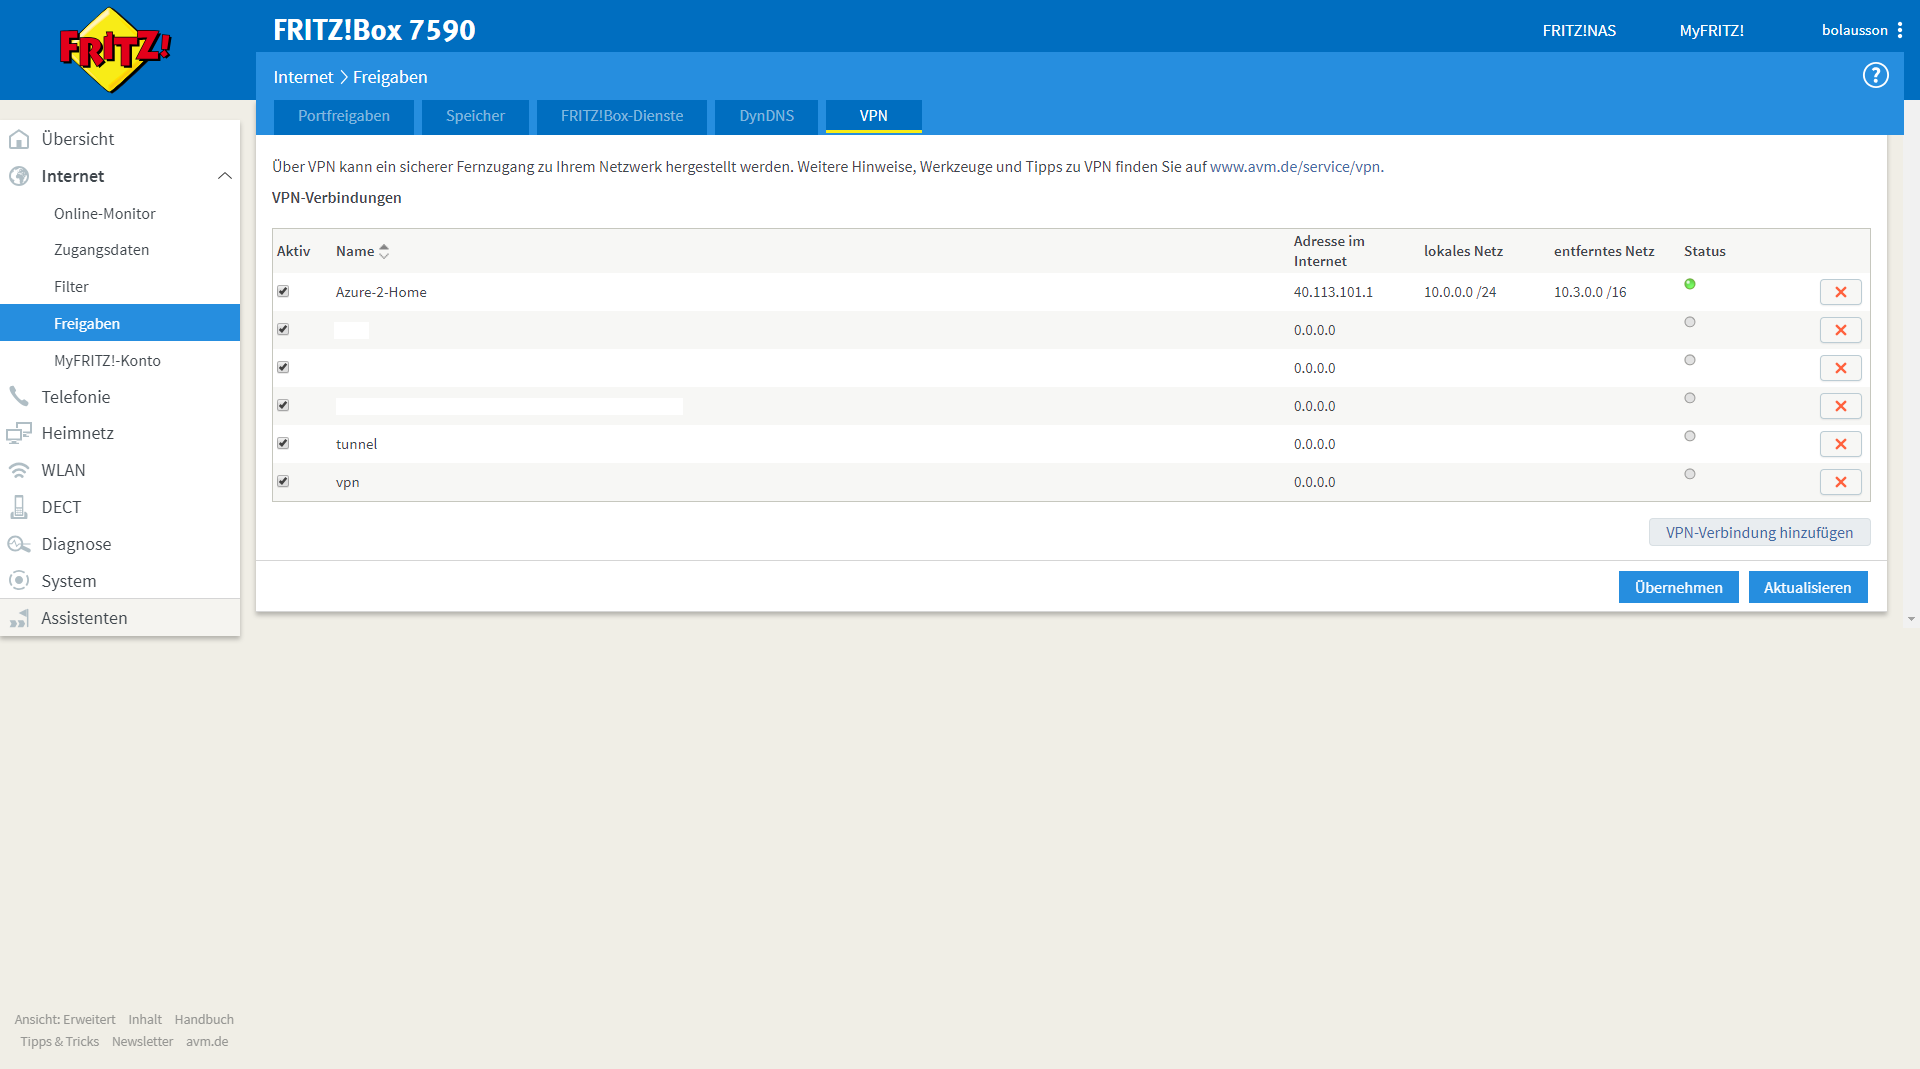
It might take a while to connect. Be patient and hit "refresh" a couple of times :-)
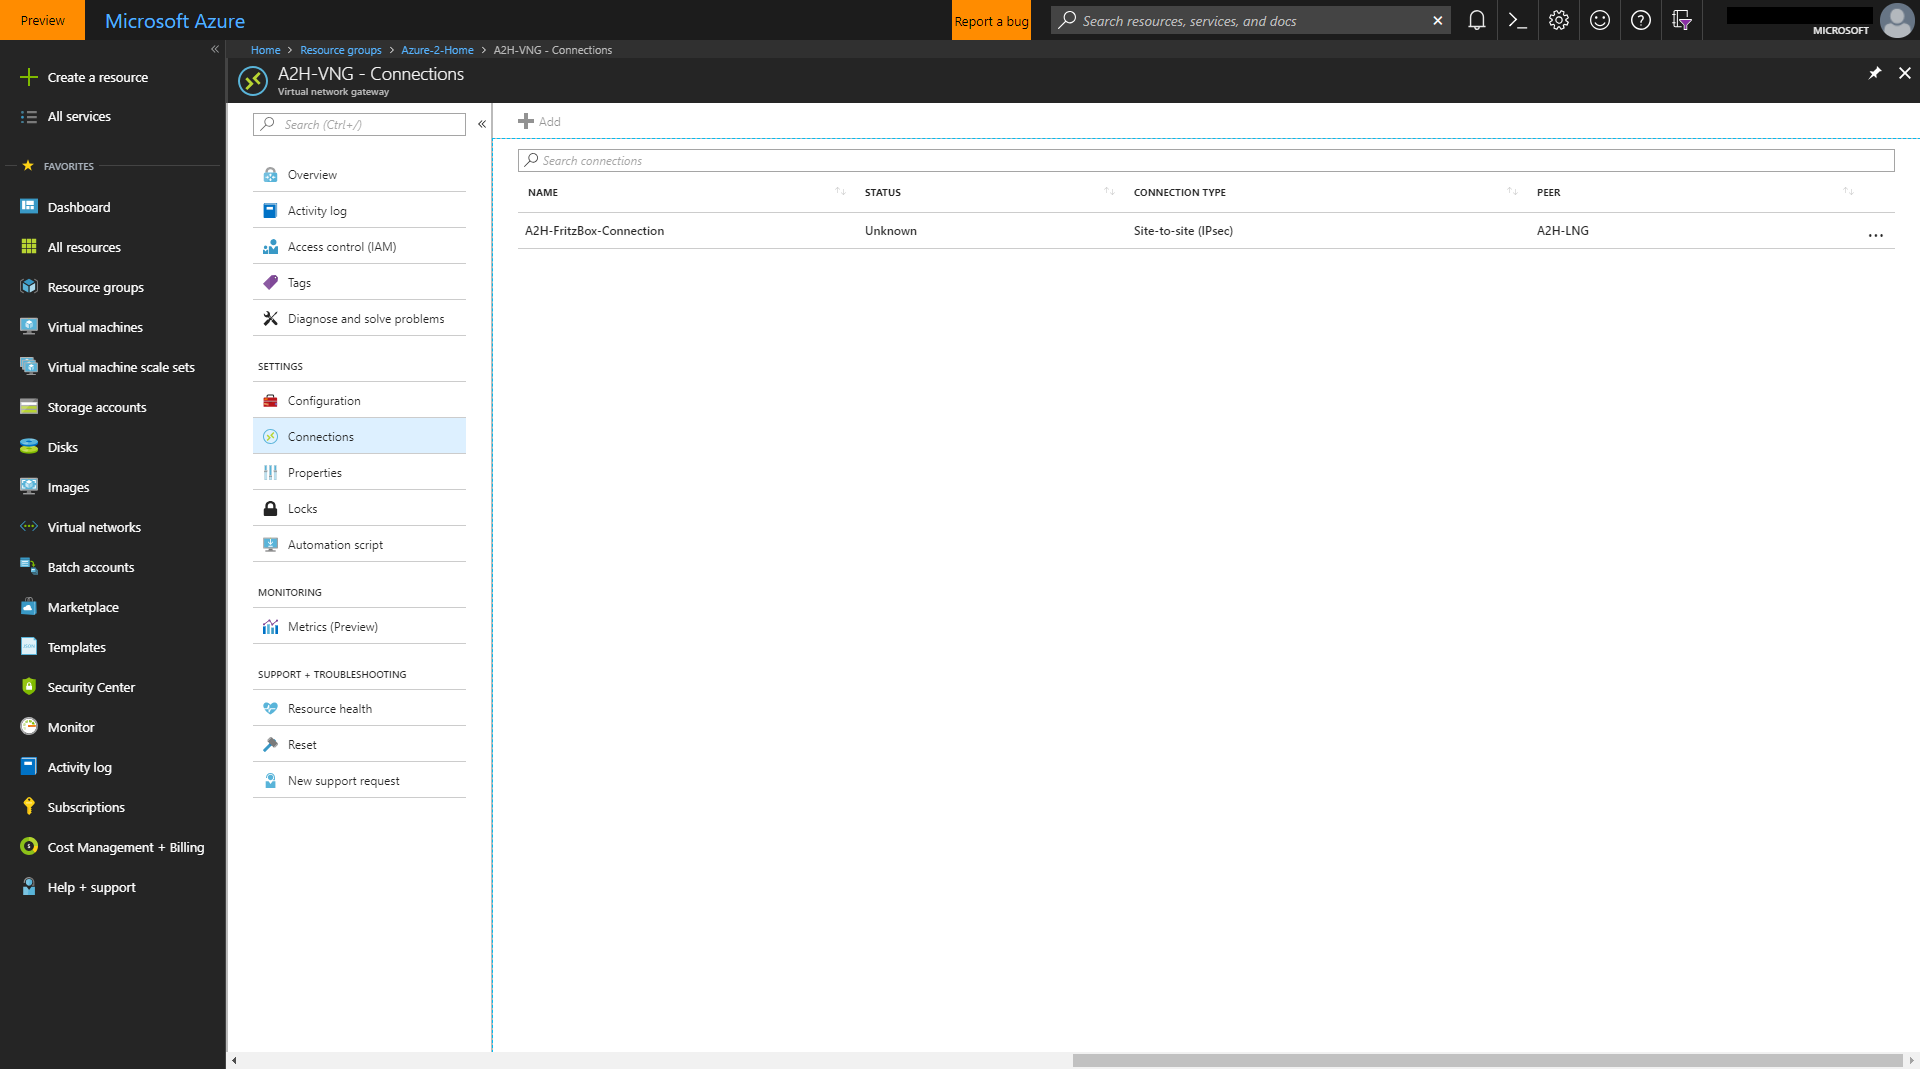
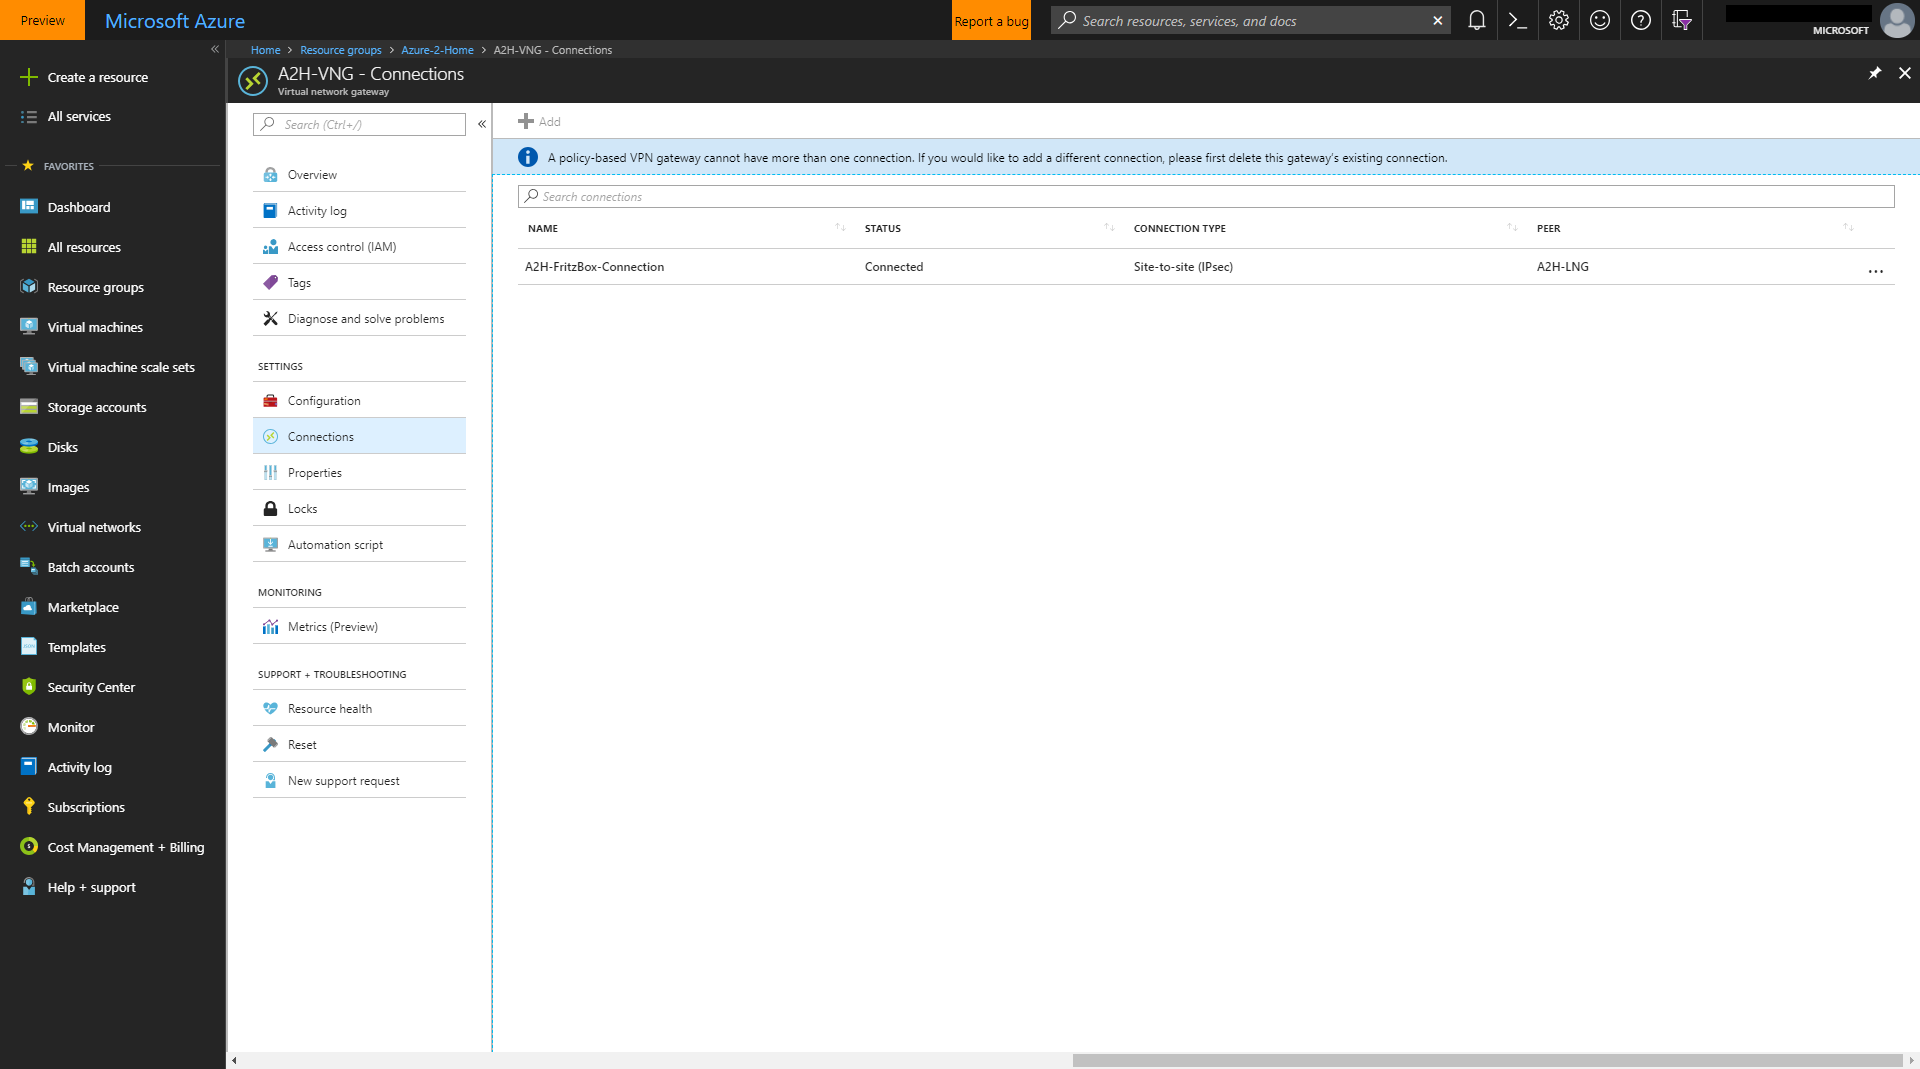
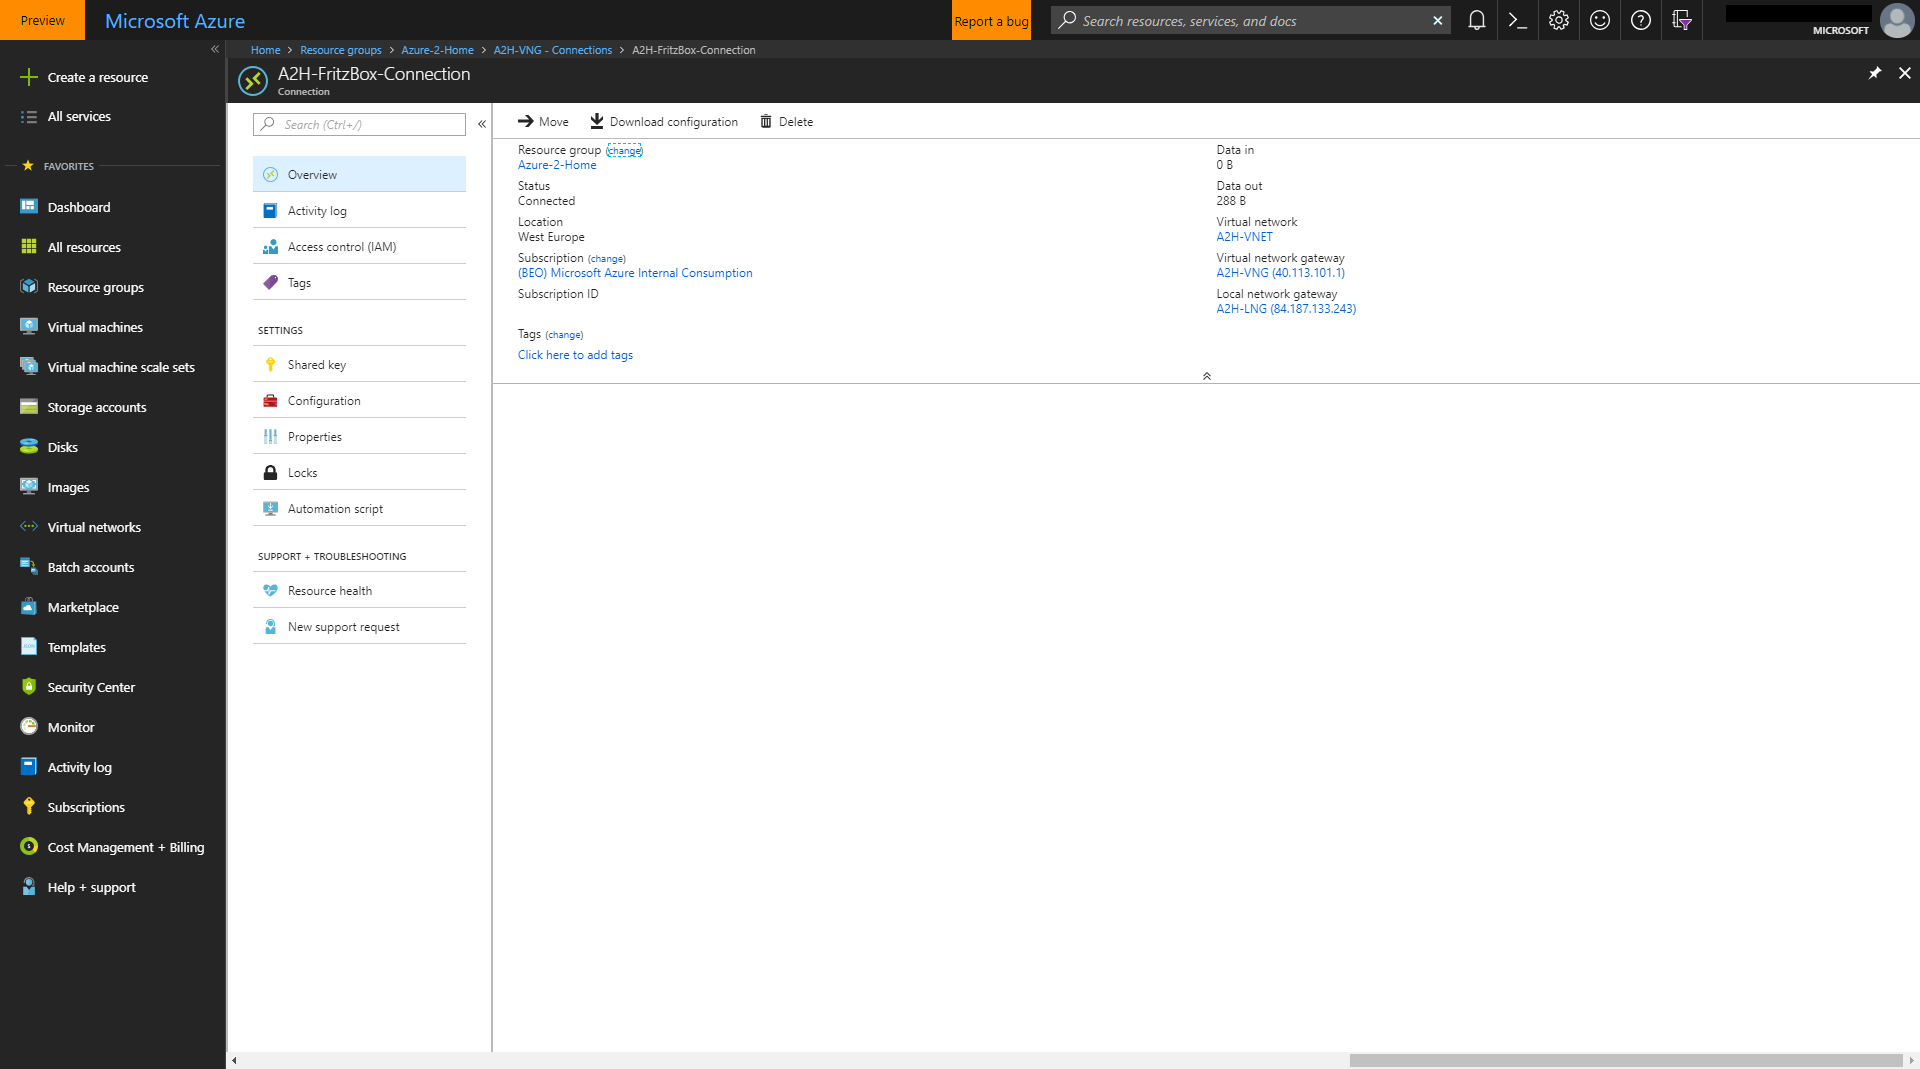
You can also check the connection status on the Azure portal by opening the "Connections" within your "Virtual Network Gateway" ("A2H-VNG"):
Caveat!
If you import your VPN settings into your FRITZ!Box, it might trigger a reconnect and your ISP will assign your FRITZ!Box a new IP. If this is the case, the Azure "Virtual Network Gateway" will not be able to connect before you change the IP address to the current one.
To do this, just go to the Azure portal, oben your "Local Network Gateway" ("A2H-LNG"), klick on "Configuration" and change the "IP address". Klick "Save" and your connection should be established soon.
You can update the IP manually via the command line using:echo az network local-gateway update -g "Azure-2-Home" -n "A2H-LNG" --gateway-ip-address `host -4 ...vc.myfritz.net | awk '/has address/{print $4}'`

Testing the connection
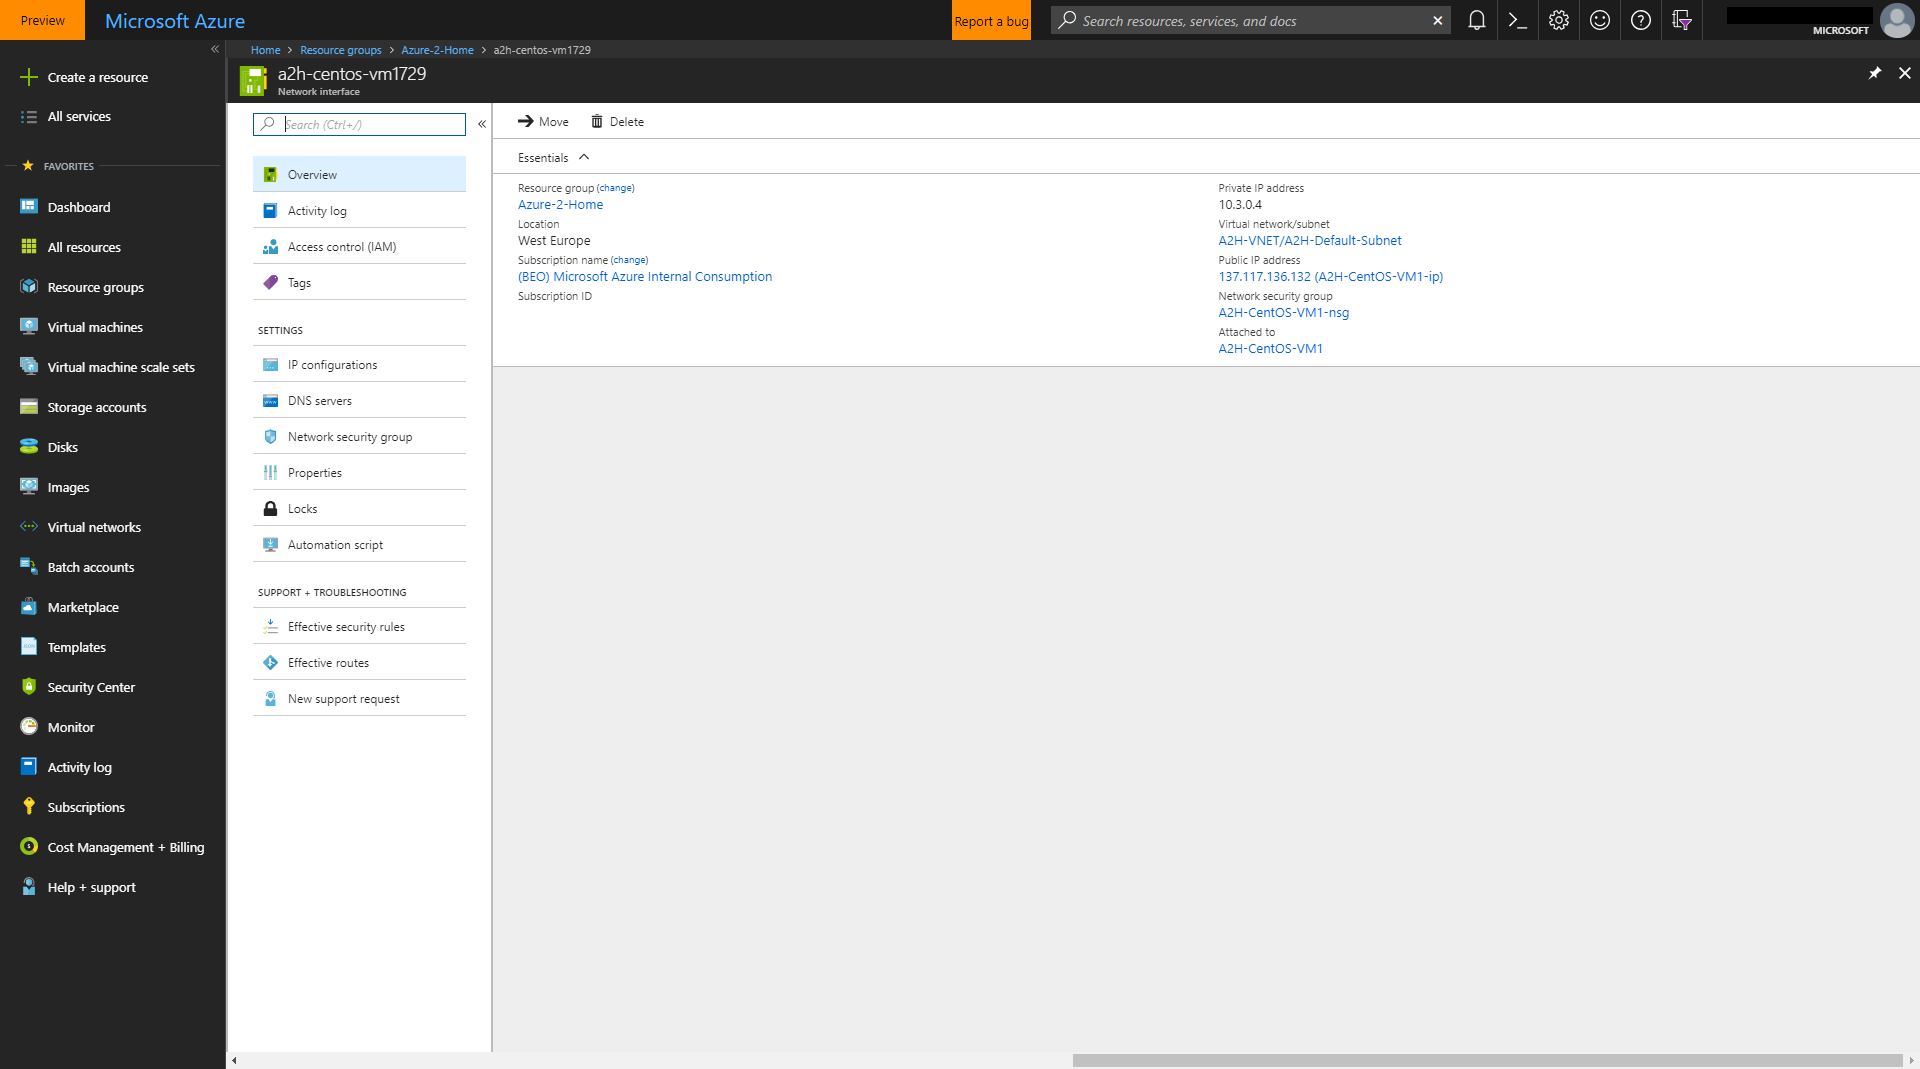
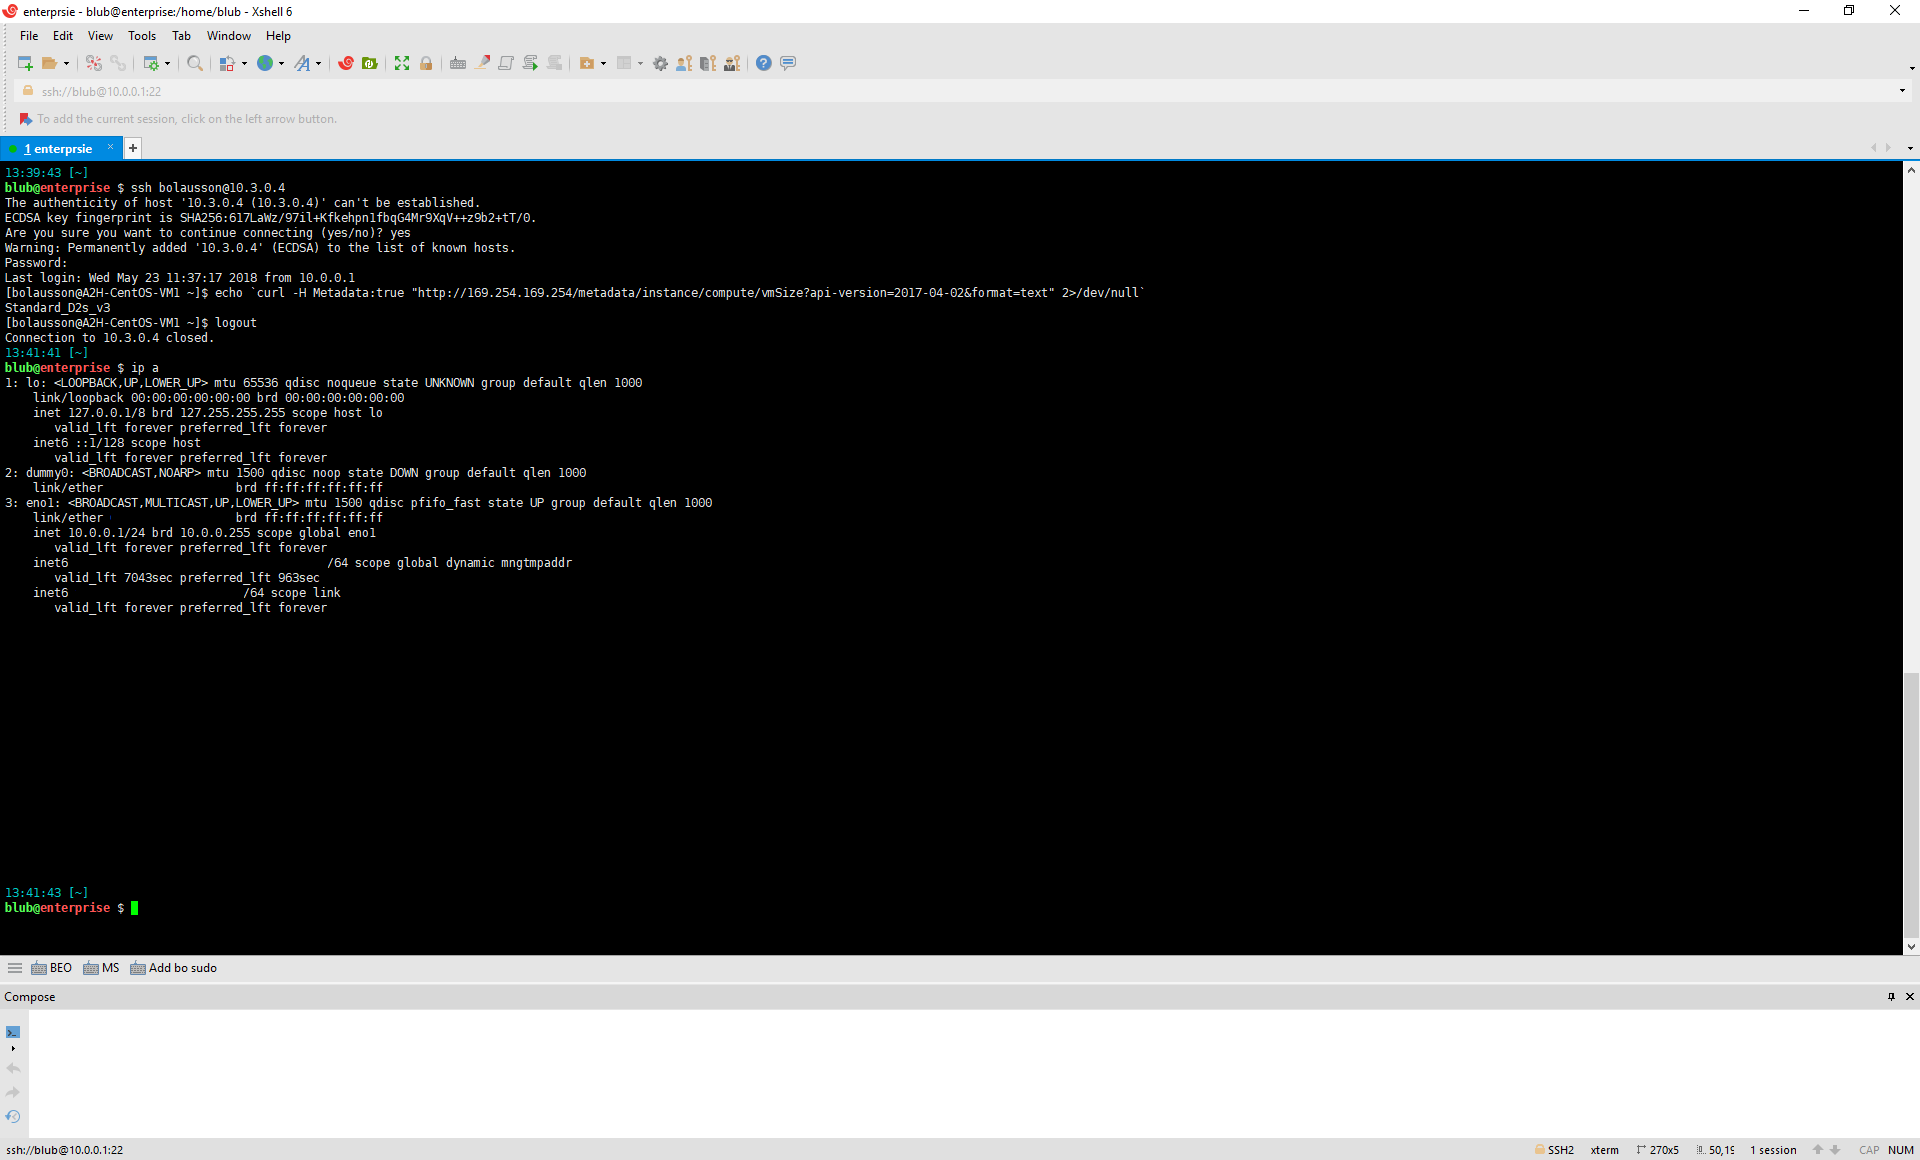
Once the connection is established, we can create a VM within the subnet "A2H-Default-Subnet" of the "Virtual Network" "A2H-VNET" and connect to it via its internal IP (10.3.0.4)
Walk-through in pictures


Update IP via CRON
I wrote a little script which can be run via CRON periodically to update the IP in case it changes. See the "Files" table at the end of this article
Update IP via Azure Automation
In the files table below, you can find a Python Runbook which you can use in an Azure Automation account to regularly check and update the Local network gateway.
Automated setup via "az" (Azure CLI)
For the lazy ones, I created a script to setup everything.
The only manual step is adding the required information in the script and import the generated VPN config file to your FRITZ!Box.
Azure CLI must be installed! https://docs.microsoft.com/en-us/cli/azure/install-azure-cli?view=azure-cli-latest